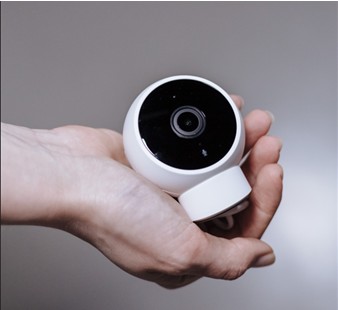
Welcome to our comprehensive guide on how to install SimpliSafe outdoor cameras. If you’re looking to boost the security of your home with an easy and effective DIY solution, you’ve come to the right place. In this step-by-step installation guide, we’ll walk you through the process of setting up your SimpliSafe outdoor camera, ensuring that your property remains safe and secure. Whether you’re a tech enthusiast or a novice, our easy-to-follow instructions will have your camera up and running in no time. Let’s dive in and get started on your journey to a safer home environment.
Step-by-Step Guide on How to Install SimpliSafe Outdoor Camera
1. Gather Your Equipment
Before you begin the installation process for your SimpliSafe outdoor camera, it’s essential to ensure you have all the necessary equipment ready. Having everything at hand will streamline the installation and prevent any unnecessary interruptions. Here’s a list of the equipment you’ll need:
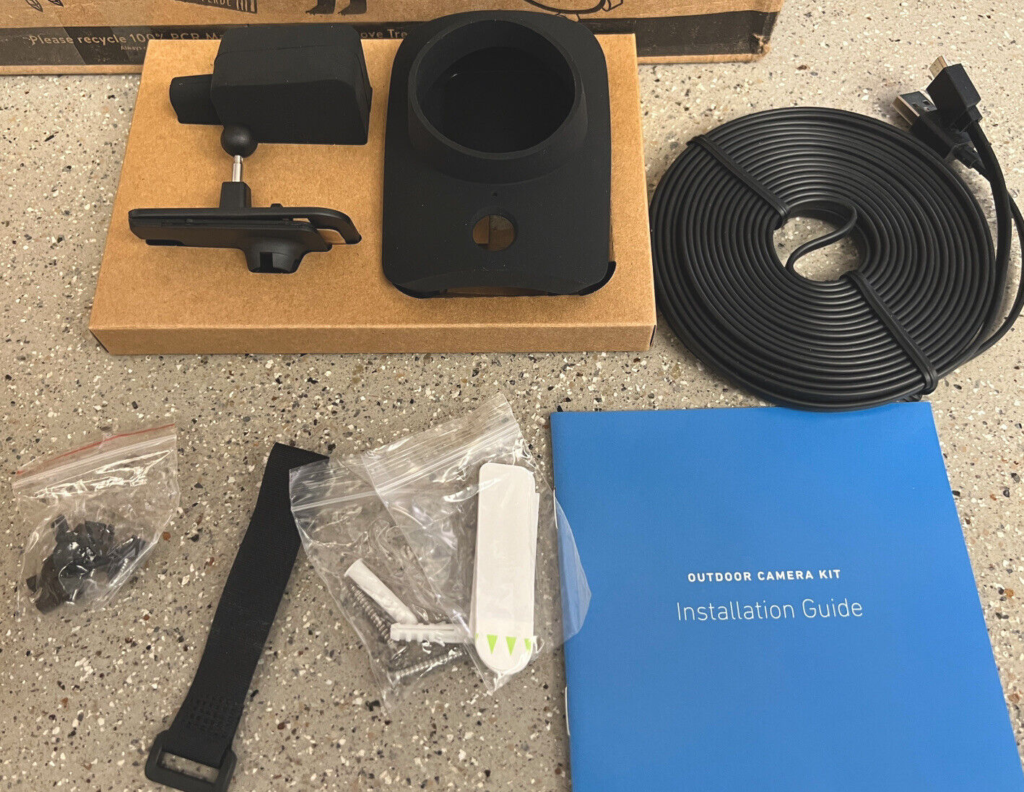
1. SimpliSafe Outdoor Camera Kit
Your SimpliSafe outdoor camera kit should include the following components:
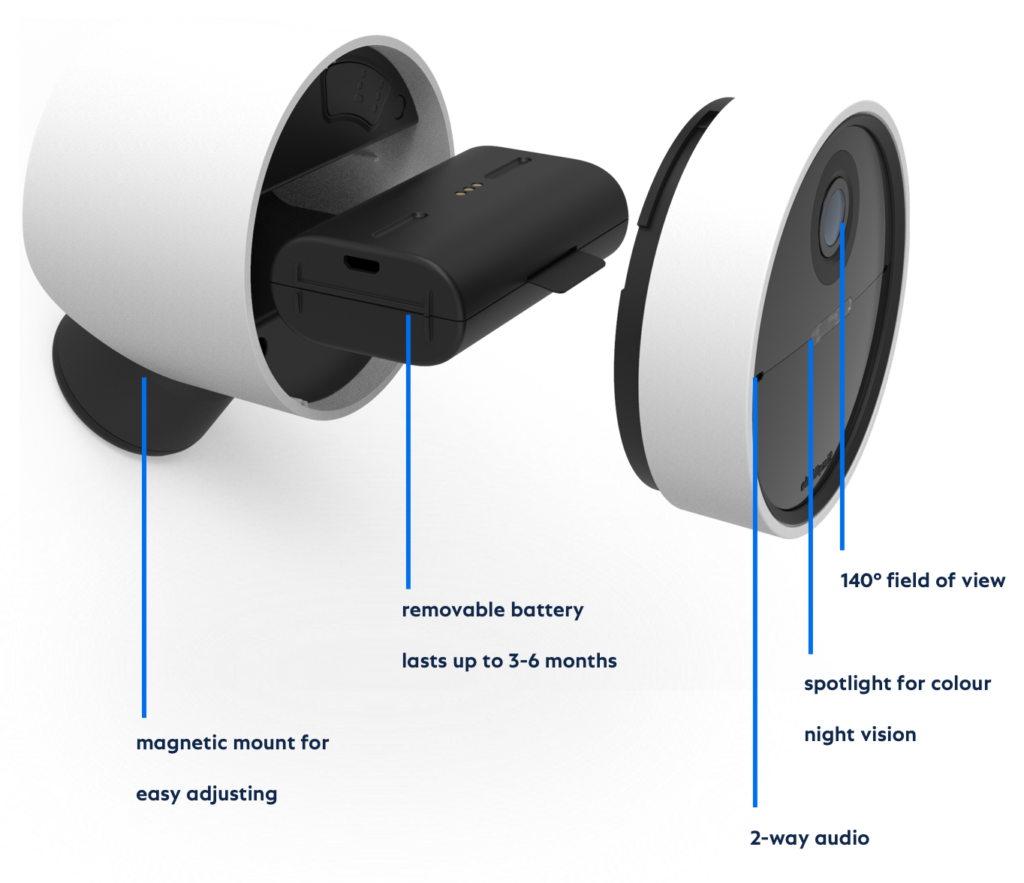
- Outdoor Camera: The heart of your security system, this is the camera you’ll be installing.
- Mounting Bracket: Used to secure the camera in place.
- Screws and Anchors: Necessary for attaching the mounting bracket securely.
- Power Adapter: For supplying power to the camera.
- Ethernet Cable (if applicable): Some installations may require an Ethernet connection.
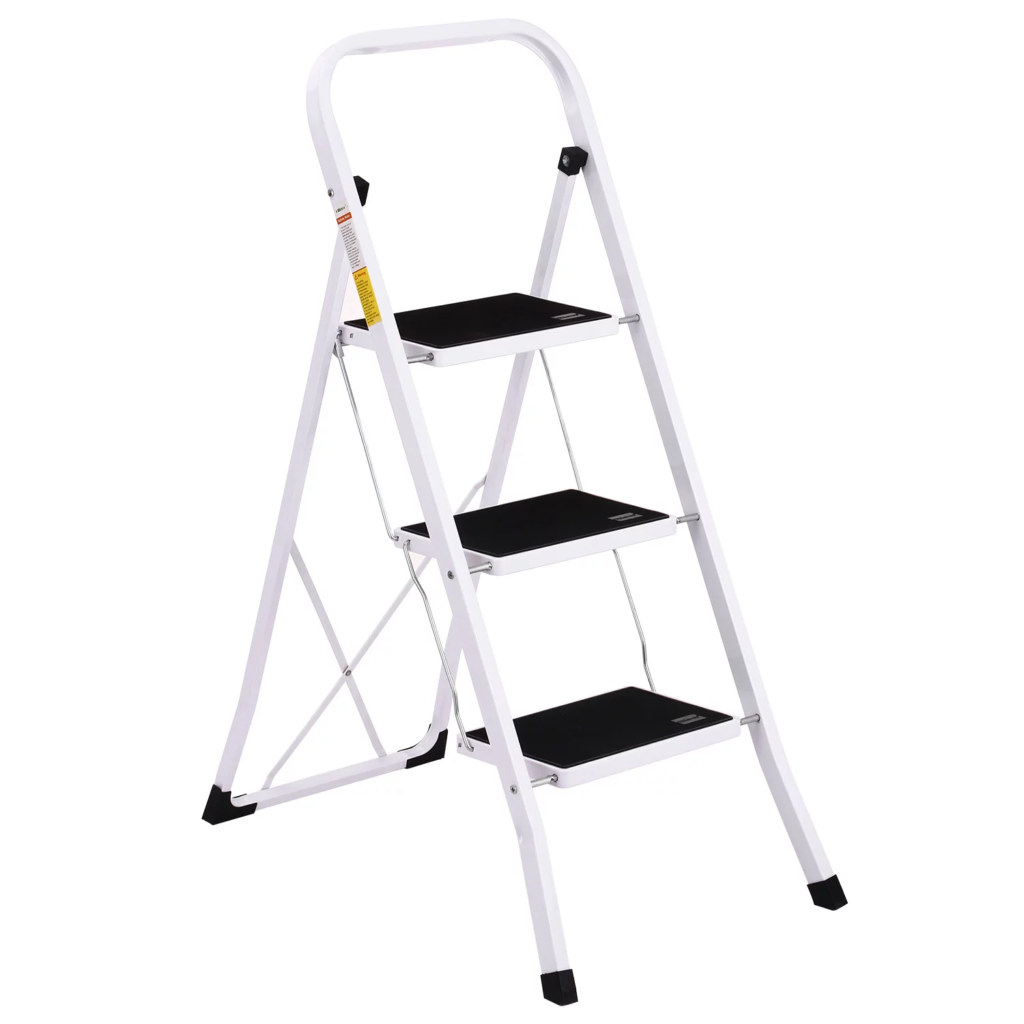
2. A Steady Ladder or Step Stool
To access the installation location, you may need a ladder or step stool. Ensure it’s stable and suitable for the height you’ll be working at.
3. Screwdriver and Drill
You’ll need a screwdriver and, in some cases, a drill for attaching the mounting bracket securely to the chosen location.

4. Smartphone or Tablet
You’ll use your smartphone or tablet to connect the camera to your Wi-Fi network and set up the SimpliSafe app for remote monitoring.
5. Wi-Fi Network Details
Make sure you have your Wi-Fi network name (SSID) and password on hand. You’ll need these to connect your camera to your home network.

6. SimpliSafe App
Before starting, ensure you have downloaded the SimpliSafe app from the App Store or Google Play Store. This app will allow you to configure and manage your camera easily.

2. Choose the Right Location
Selecting the optimal location for your SimpliSafe outdoor camera is a critical step to ensure effective security coverage. Here’s how to choose the right spot:
1. Survey Your Property
Begin by surveying your property and identifying areas that require surveillance. Common locations include:
- Front Door: This is often the primary entrance point and a crucial area to monitor.
- Backyard: Covering your backyard can help keep an eye on outdoor spaces.
- Driveway: Monitoring your driveway enhances security for your vehicles.
- Side Entrances: If you have side entrances or pathways, consider positioning a camera here.
- Garage: For those with a garage, it’s a valuable area to monitor.

2. Consider Camera Placement
Once you’ve identified areas to monitor, consider the following factors when choosing the specific camera placement:
- Height: Mount the camera high enough to capture clear images and out of easy reach to prevent tampering.
- Angle: Ensure the camera covers the desired area without obstructions.
- Weather Protection: Position the camera where it’s sheltered from direct rain and sunlight to prolong its lifespan.
- Power Source: Ensure the camera can be connected to a power source easily.

3. Test the Camera View
Before mounting the camera, temporarily position it in your chosen location and check the camera’s view through the SimpliSafe app on your smartphone or tablet. Ensure it covers the intended area and provides a clear view.

4. Ideal Camera Locations
Here are some common ideal locations for your SimpliSafe outdoor camera:
- Above the Front Door: Covering the front entrance provides visibility to visitors and potential intruders.
- Overlooking the Driveway: Monitoring the driveway can capture activity near your vehicles.
- Backyard Corners: Placing cameras at corners can provide a wide-angle view of your backyard.
- Garage Entry: If your garage has an external entry, this is a valuable location to monitor.

3. Mount the Camera
Now that you’ve chosen the perfect location for your SimpliSafe outdoor camera, it’s time to mount it securely. Follow these steps to ensure a stable installation:
1. Gather Your Tools
Before you start, make sure you have the necessary tools and equipment:
- SimpliSafe Outdoor Camera Kit: Ensure you have all the components ready.
- Screwdriver: You’ll need this for attaching the camera to the mounting bracket.
- Drill (if necessary): Some installations may require pre-drilling holes for screws.
2. Attach the Mounting Bracket
Follow these steps to attach the mounting bracket:
- Position the mounting bracket in the chosen location.
- Use the provided screws and anchors to secure the bracket firmly to the surface.
- Make sure the bracket is level to ensure a proper camera angle.

3. Connect the Camera
With the mounting bracket in place, it’s time to attach the camera:
- Align the camera’s mounting holes with the bracket’s holes.
- Use the screws provided in the kit to secure the camera to the bracket.
- Ensure the camera is securely fastened to prevent any movement.

4. Adjust the Camera Angle
Once the camera is attached, adjust its angle to capture the desired view:
- Tilt the camera up, down, left, or right to ensure it covers the area you want to monitor.
- Ensure there are no obstructions in the camera’s field of view.
5. Power Up the Camera
Connect the power adapter to the camera and plug it into a nearby power source. Make sure the camera receives power for it to function correctly.

4. Connect to Wi-Fi
To enable remote monitoring and access the full functionality of your SimpliSafe outdoor camera, you need to connect it to your Wi-Fi network. Follow these steps to ensure a successful Wi-Fi connection:
1. Camera Preparation
Before you start, make sure your SimpliSafe outdoor camera is powered on and ready for setup. Ensure it’s connected to a power source, and the status light on the camera indicates that it’s in setup mode.
2. Access the SimpliSafe App
- Open the SimpliSafe app on your smartphone or tablet. If you haven’t already downloaded the app, you can find it on the App Store (for iOS) or Google Play Store (for Android).

3. Add a New Device
- In the SimpliSafe app, navigate to the “Add New Device” or “Setup New Device” option. This will initiate the setup process.
4. Scan the QR Code
- Follow the on-screen instructions in the app, which will prompt you to scan the QR code located on the camera. This code contains important setup information.
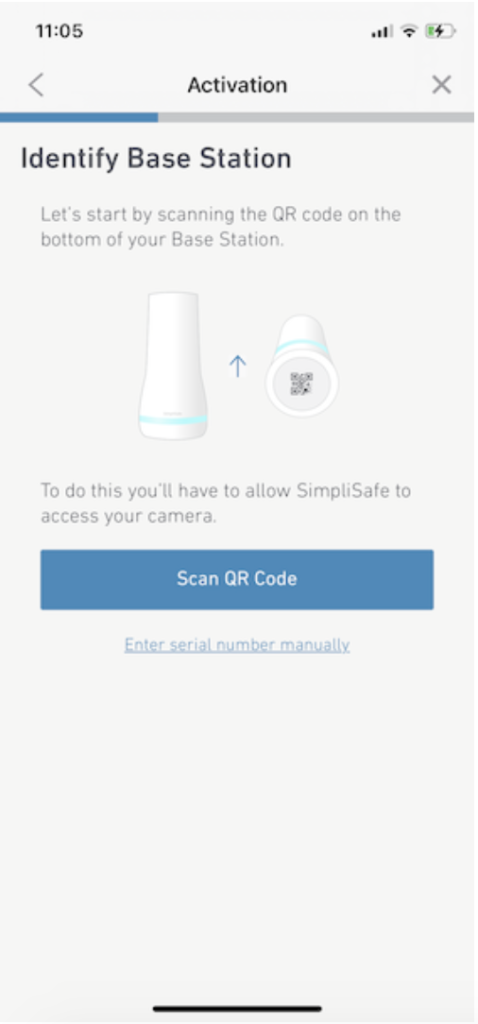
5. Connect to Wi-Fi
- The app will guide you through the process of connecting the camera to your Wi-Fi network. You’ll need to enter your Wi-Fi network name (SSID) and password.
- Ensure that you enter the correct credentials to establish a successful connection.
6. Wait for Confirmation
- Once you’ve entered the Wi-Fi details, the camera will attempt to connect to your network. Wait for the app to confirm a successful connection. This may take a few moments.
7. Name Your Camera
- Give your camera a unique name for easy identification within the app. Common names include “Front Door” or “Backyard.”
- This step is especially helpful if you plan to install multiple cameras.
5. Set Up the SimpliSafe App
The SimpliSafe app is your control center for monitoring and managing your outdoor camera. Follow these simple steps to set up the app and get your camera online:
1. Download the SimpliSafe App
- If you haven’t already, download the SimpliSafe app from the App Store (for iOS) or Google Play Store (for Android). Install the app on your smartphone or tablet.

2. Create or Log In to Your Account
- Open the SimpliSafe app and create a new account if you’re a first-time user. If you already have a SimpliSafe account, log in using your credentials.

3. Add Your Camera
- In the app, select “Add Device” or a similar option. This will prompt you to add your SimpliSafe outdoor camera to your account.
4. Scan the QR Code
- Scan the QR code on the camera or enter the camera’s unique serial number. This step helps the app identify your camera.

5. Configure Camera Settings
- Follow the on-screen instructions to customize your camera’s settings. You can choose a name for the camera (e.g., “Front Yard”), set up motion detection, and configure alerts.

6. Complete the Setup
- Once you’ve configured your camera settings, you’ll receive confirmation that your camera is successfully added to the app. You can now access live video feeds, view recorded footage, and receive alerts from your outdoor camera.
Testing and Troubleshooting
After installing your SimpliSafe outdoor camera and setting up the app, it’s crucial to ensure everything is working correctly. Here’s how to test your camera and troubleshoot common issues:
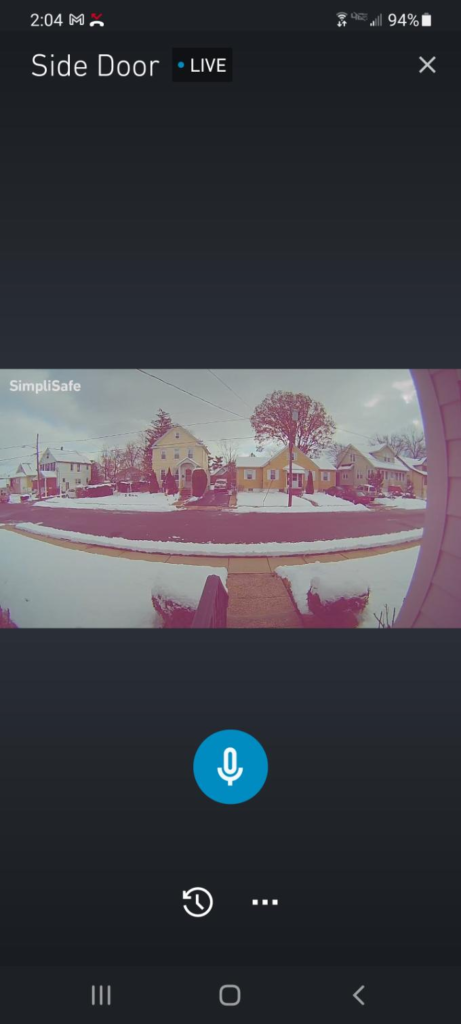
1. Test the Camera Feed
- Open the SimpliSafe app on your smartphone or tablet.
- Locate your camera and tap to view the live feed.
- Ensure the camera provides a clear and reliable video feed of the monitored area.
2. Test Motion Detection
- Trigger motion detection by walking in front of the camera or creating movement within its field of view.
- Verify that the camera detects motion and sends notifications or alerts to your app.

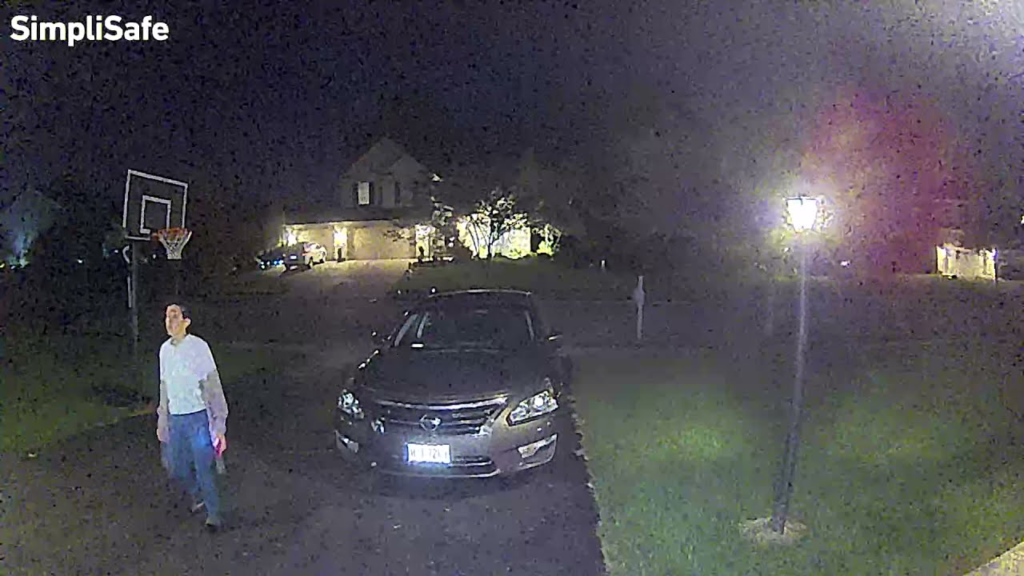
3. Check for Night Vision
- Test the camera’s night vision functionality by covering the lens or positioning it in a dark area.
- Confirm that the camera switches to night vision mode and provides clear video in low-light conditions.
4. Review Alert Notifications
- Create test alerts by simulating motion or events that should trigger notifications.
- Check your smartphone or tablet to ensure you receive timely alerts from the app.

Troubleshooting Common Issues
If you encounter any issues during testing, consider the following troubleshooting steps:
- Check Wi-Fi Connection: Ensure that your camera is still connected to your Wi-Fi network.
- Camera Placement: Reevaluate the camera’s placement to ensure it covers the intended area without obstructions.
- Camera Power: Verify that the camera is receiving power from the adapter and is functioning correctly.
- App Settings: Double-check the app settings for your camera, including motion detection sensitivity and alert preferences.
Tips and Best Practices
As you complete the installation of your SimpliSafe outdoor camera, consider these tips and best practices to ensure optimal performance and security:
1. Regular Maintenance
- Periodically clean the camera lens to maintain clear image quality.
- Check for any obstructions that may affect the camera’s view, such as overgrown plants or debris.

2. Secure Wiring
- If your camera requires wiring, secure it to prevent tripping hazards and tampering.
- Conceal wiring where possible to deter potential intruders from tampering with the camera.

3. Wi-Fi Signal Strength
- Ensure a strong and stable Wi-Fi signal at the camera location. A weak signal may result in connectivity issues.
- Consider using Wi-Fi range extenders if needed to improve coverage.
4. Firmware Updates
- Keep your camera’s firmware up to date. Manufacturers often release updates to enhance functionality and security.
- Check the SimpliSafe app for firmware update notifications.
5. Privacy Settings
- Review and configure privacy settings within the app to protect your personal information and footage.
- Share access to the camera only with trusted individuals.
6. Customize Alerts
- Tailor your alert settings to your preferences. Adjust motion sensitivity levels to avoid unnecessary alerts.
- Set up specific alert schedules, such as when you’re away from home.
7. Secure the App
- Enable app security features such as PIN or biometric authentication to prevent unauthorized access.
- Regularly change your app login credentials for added security.
8. Backup Power
- Consider a battery backup or uninterruptible power supply (UPS) for your camera in case of power outages.
- This ensures uninterrupted surveillance even during electrical disruptions.
9. Test Periodically
- Periodically repeat the testing process outlined earlier to ensure your camera’s continued functionality.
- Familiarize yourself with the app’s features and settings for quick access during emergencies.
Frequently Asked Questions (FAQ)
Here are answers to some common questions about installing and using your SimpliSafe outdoor camera:
1. Do I Need Professional Installation?
- No, SimpliSafe outdoor cameras are designed for easy DIY installation. This guide provides step-by-step instructions to help you install the camera yourself.
2. What Tools Do I Need for Installation?
- You’ll need basic tools, including a screwdriver and, in some cases, a drill. Refer to the “Gather Your Equipment” section for a complete list.
3. Can I Install the Camera Indoors?
- While the camera is designed for outdoor use, you can install it indoors if needed. Ensure it has a clear view of the area you want to monitor.
4. What Is the Range of the Camera’s Wi-Fi Connection?
- The camera’s Wi-Fi range depends on your home network’s signal strength. Typically, it works well within the range of your Wi-Fi network.
5. How Do I View Live Video Feeds on the App?
- Open the SimpliSafe app, select your camera, and tap to view the live feed. Ensure your camera is connected to Wi-Fi and powered on.
6. Can I Access Footage Remotely?
- Yes, you can access recorded footage remotely through the SimpliSafe app. The camera stores footage in the cloud, and you can review it at any time.
7. Is Night Vision Effective?
- Yes, SimpliSafe outdoor cameras are equipped with effective night vision capabilities, providing clear video in low-light conditions.
8. What If I Forget My App Password?
- You can reset your app password through the app’s login page. Follow the password reset instructions provided.
9. How Do I Extend Camera Battery Life?
- SimpliSafe outdoor cameras are typically powered by a constant power source, so battery life is not a concern. Ensure a stable power connection for uninterrupted operation.
Conclusion
Congratulations! You’ve successfully completed the installation of your SimpliSafe outdoor camera, taking a significant step toward enhancing the security of your home. By following our comprehensive guide, you’ve learned how to mount the camera, connect it to your Wi-Fi network, set up the SimpliSafe app, and even test its functionality.
Remember, your outdoor camera is a powerful tool that provides peace of mind and helps protect what matters most to you. Here are a few key takeaways from this guide:
- Easy DIY Installation: SimpliSafe’s outdoor cameras are designed for DIY installation, saving you time and money on professional installation fees.
- Remote Monitoring: With the SimpliSafe app, you can monitor your camera’s live feed and access recorded footage from anywhere, ensuring you’re always in control of your home’s security.
- Effective Night Vision: Your camera’s night vision capability means you can count on it to deliver clear video even in low-light conditions.
- Regular Maintenance: To ensure your camera continues to perform at its best, remember to perform regular maintenance, including cleaning the lens and checking for obstructions.
- Security and Privacy: Utilize the app’s security features, such as setting up PIN or biometric authentication, to keep your camera and data secure.
As you enjoy the benefits of your SimpliSafe outdoor camera, don’t forget to refer back to our “Tips and Best Practices” section for ongoing maintenance and optimization. Your safety and peace of mind are our top priorities.
Thank you for choosing SimpliSafe, and we hope this guide has been instrumental in making your installation process smooth and efficient. If you have any further questions or need additional support, don’t hesitate to reach out to SimpliSafe’s customer service.
Stay safe, stay secure, and enjoy the added protection your SimpliSafe outdoor camera brings to your home!
